Test management is the process of taking a project's requirements, building a test plan, writing the tests, planning the test activities and capturing the results. Test management tools that provide these capabilities, ease the testing process drastically. One such test management tool is Zephyr for JIRA.
Zephyr is an integrated plugin which provides the test management capabilities for projects in JIRA. Let's discover Zephyr for JIRA (cloud version) as a test management tool.
How to Integrate Zephyr with JIRA?
First, we need to install Zephyr for JIRA plugin and then add the issue type ‘test’ to the project.

Zephyr for Test Management
1. Creating a Test Cycle
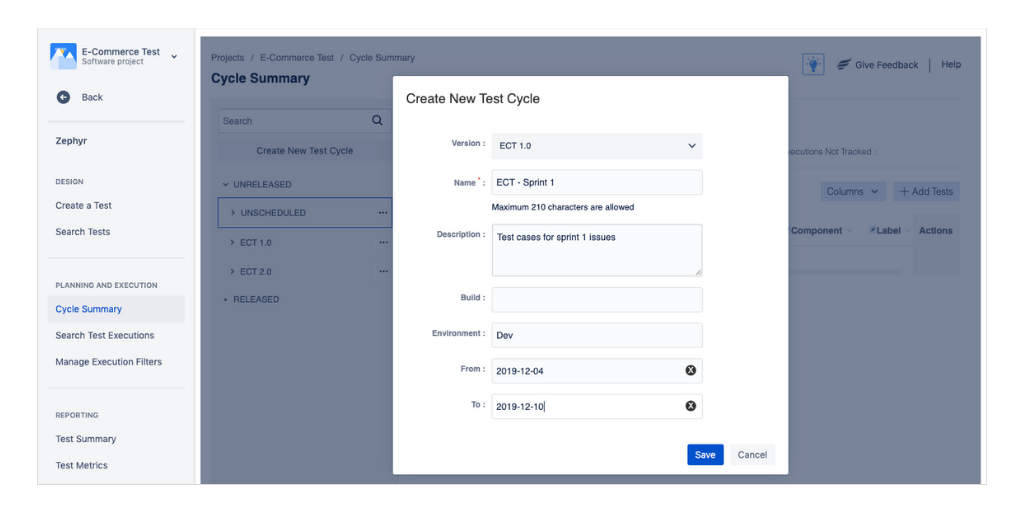
A test cycle is a container for test cases. It allows the test cases to be grouped logically and executed in a structured fashion.
First, we need to create a test cycle using below steps:
2. Creating Test
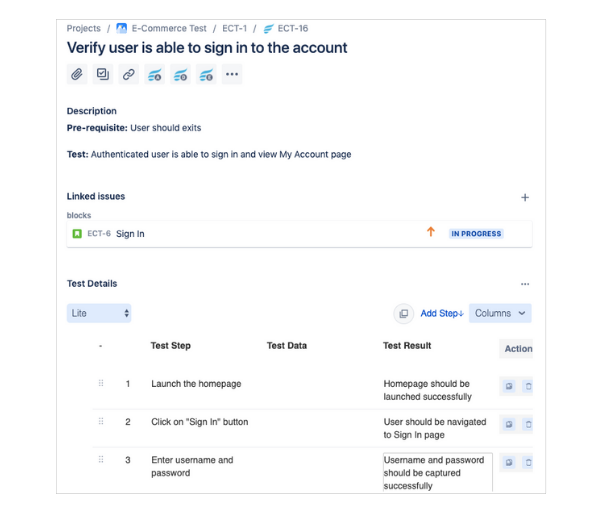
A test case is a set of actions executed to verify a particular feature or functionality of the software application. To create a test case in Zephyr, first, we need to create an issue with type ‘Test’ and then add test steps to it.
Step 1: Creating a Test
Test Summary - Title of the test cases. Mandatory field.
Test Description - Description of the test case
Components - Select component specific to the project or feature
Fix Version - Select fix version/Release of the project
Priority - Select the priority of the test case
Assign To - Name of the user responsible for executing the test cases
Sprint - Sprint of the test case
Epic Link/Story links - Epic/Story ID for which test cases is been created
Attachments - Attach evidence/reference document
Step 2: Adding test steps to the Test
Edit - Click on the cell - Modify - Click outside the cell
Clone - Click on the ‘Clone’ button available under the ‘Actions’ column
Delete - Click on ‘Delete’ button available under ‘Actions’ column
3. Adding Tests to Test Cycle
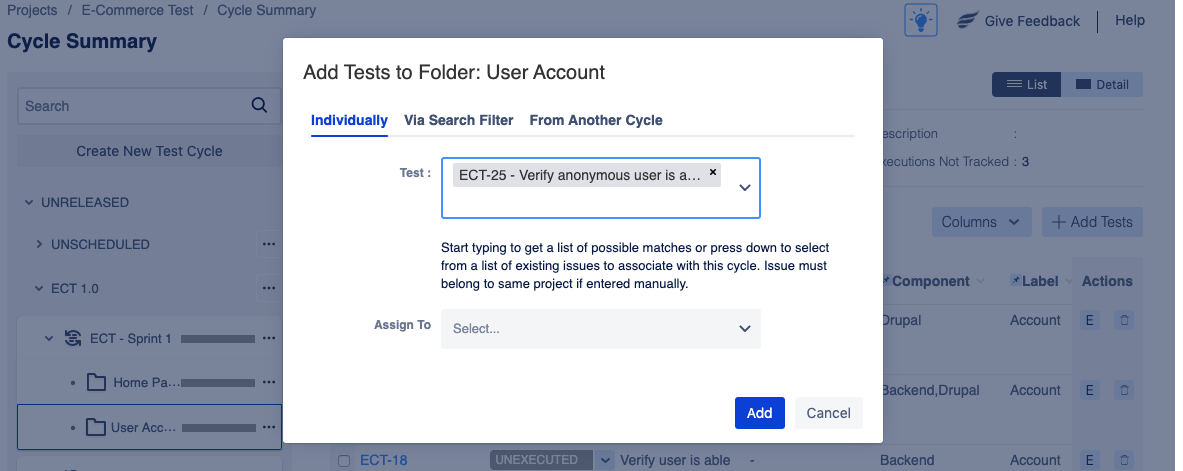
We can add tests to test cycle in two ways:
Individually - Using Test ID
Via Search Filter - Using existing Search Filter
Another Cycle - Using Another test cycle
3. Executing Tests
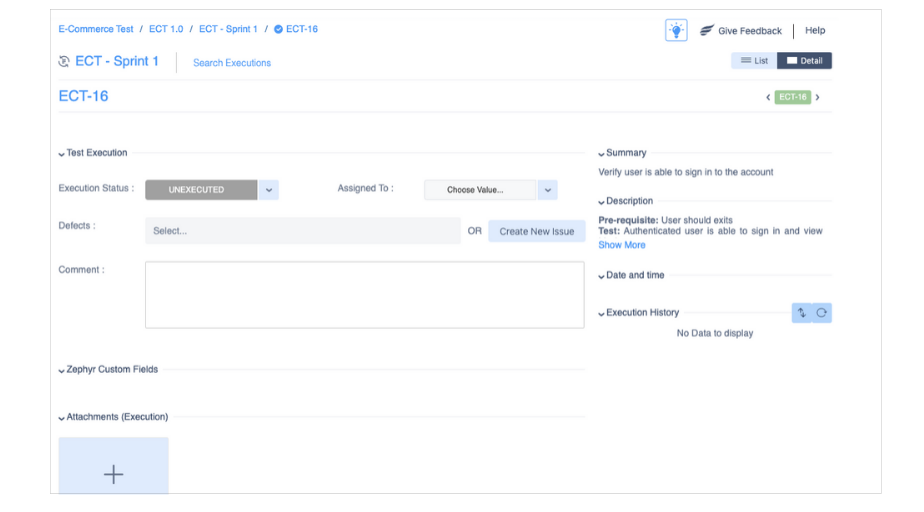
Test Execution is the process of executing the test cases in a test cycle and comparing the expected and actual results. After adding tests to the test cycle, we need to execute them. We can execute the test in Zephyr using either of the below ways:
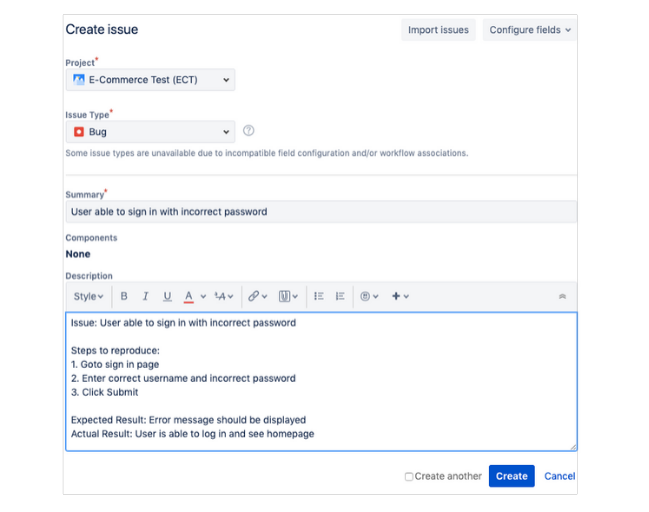
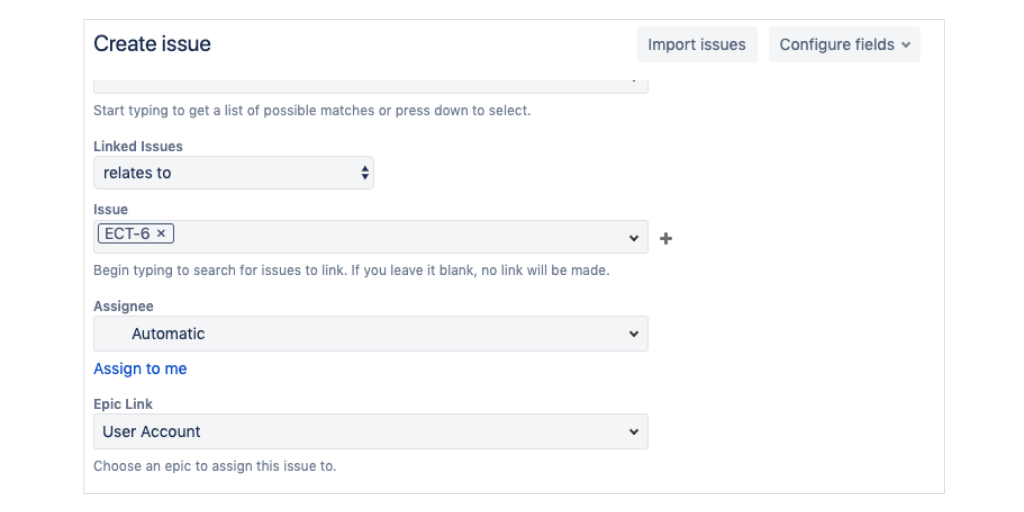
4. Raising and Linking Bug
Summary - Title of the bug
Reporter - User reporting the bug/issue
Description - Description of the bug (Steps to reproduce, Actual/Expected result)
Priority - Select Priority of the bug to get fixed
Linked Issues - Select test/issues related to this bug
Assign To - Select user who will work to fix this issue
5. Tracking Testing Progress
There are several ways to track testing progress in Zephyr.
The ‘Test Summary’ page gives an organized view of all the tests for a particular project, broken down by Versions, Components, and Labels.
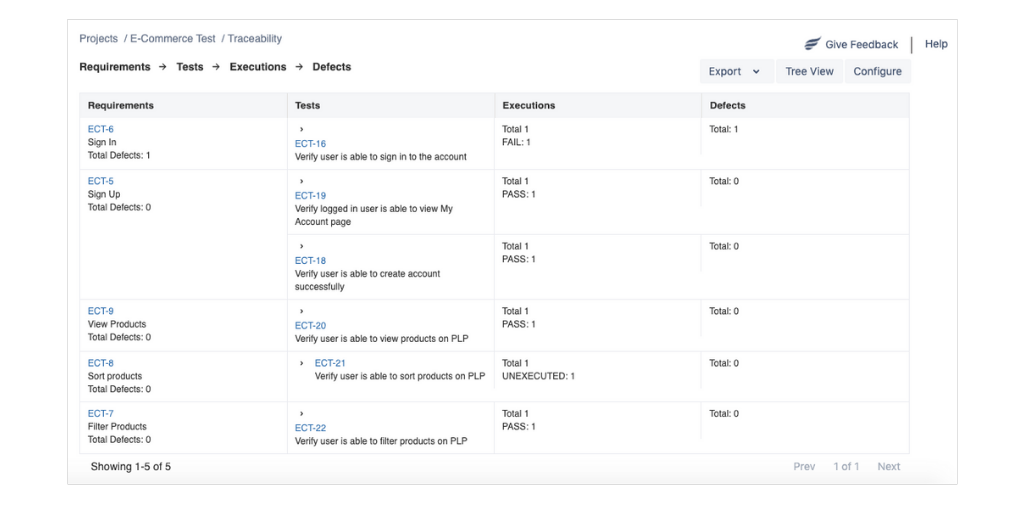
Traceability matrix provides the ability to map requirements to defects or vice-versa. Zephyr provides two traceability matrices:
1. Requirements to Defects: Generates full traceability report from Requirements - Tests - Test Executions - Defects.
2. Defects to Requirements: Generates full traceability report from Defects - Test Executions - Tests - Requirements.
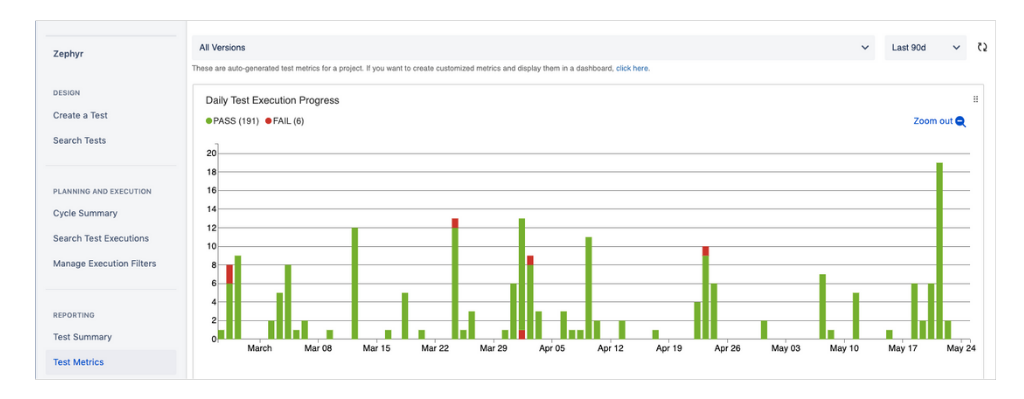
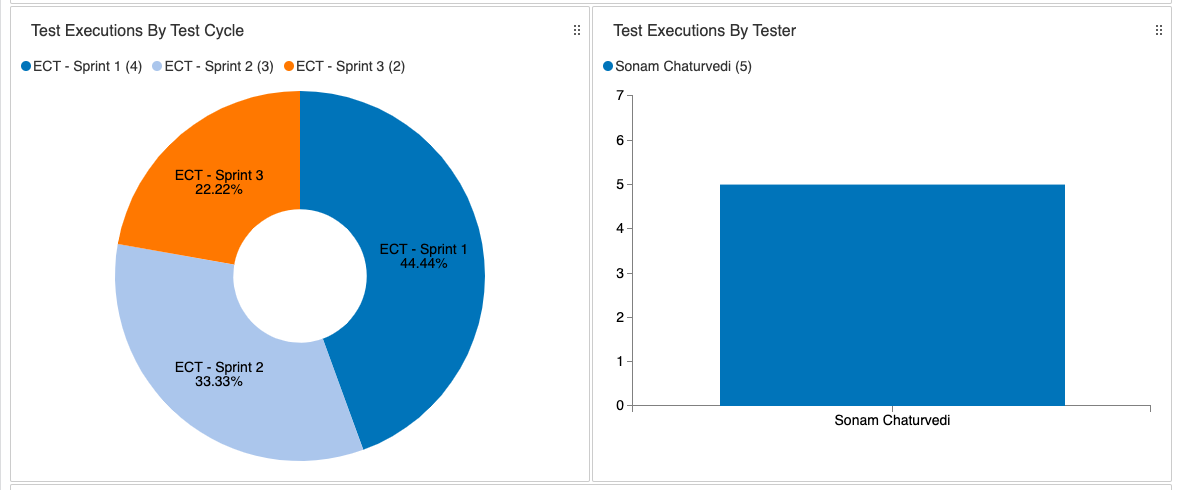
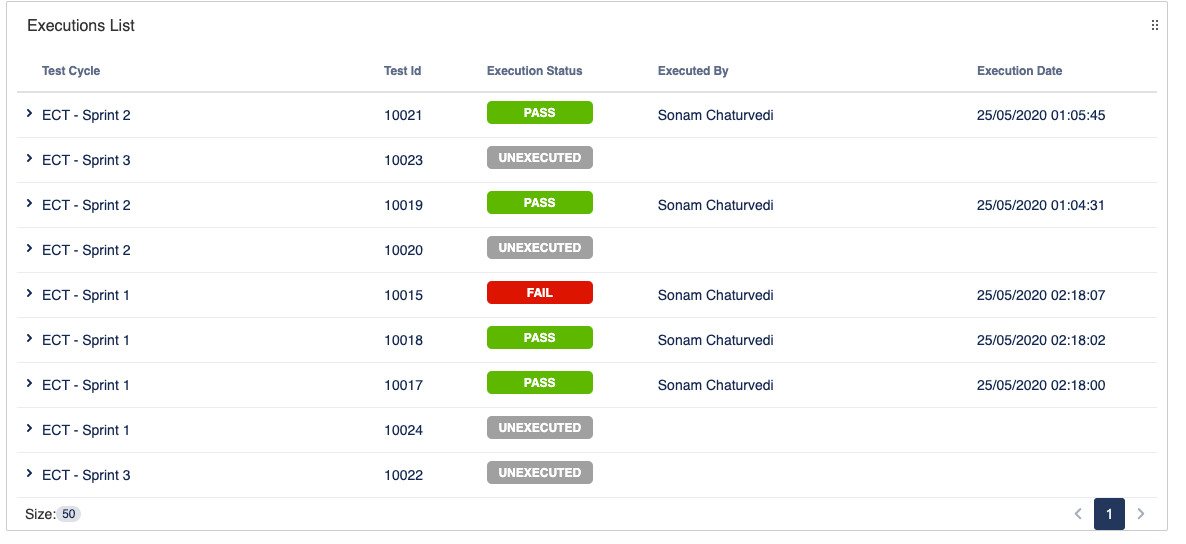
Zephyr automatically tracks below test metrics for the project/version:
Pros and Cons of Zephyr
Pros:
Cons:
Thanks for reading! Hope this gives you an overview of how to integrate Zephyr with JIRA and use test management capabilities in any JIRA project. Part 2 of this blog series Zephyr for JIRA: Features explores some quick and handy features of Zephyr. Stay tuned!